How to grow your own nails. How to extend nails at home with acrylic and gel - step-by-step instructions
Not every woman can boast of strong nails beautiful shape. However, it is possible to get the perfect manicure using nail extensions. Many resort to the services of nail specialists for this, but with the advent of the gel system, which is easier to use than acrylic, it has become possible to lengthen nails or restore broken ones at home.
List of tools and materials you can’t do without when doing extensions
Nail extensions in a salon are an expensive procedure, and many people decide to save money by mastering the technology of modeling gel nails at home. However, in this case, you should be prepared for the fact that at the initial stage you will still need to shell out a tidy sum, since necessary materials and equipment cost a lot. When purchasing consumables, it is extremely important to focus on time-tested brands, because the ease of learning, as well as the final result, depend on the quality of the materials.
Three gel systems are used for nail extensions:
- Three-phase - includes three components (layers) with different functions. The first ensures safe interaction of the nail with the composition and improves adhesion. The second layer is intended directly for modeling the future nail. The third is protective and is responsible for strength, smoothness and shine.
- Two-phase - consists, respectively, of two components. The first combines the functions of grip and modeling, while the other provides durability.
- Single-phase - carries all three functions and is the most universal.
Minimum list of tools and materials required for extension:
- UV or LED lamp 36 or 48 W;
- a set of files of different abrasiveness (100, 120, 180, 240 grit);
- buff for removing gloss from the nail plate;
- a metal pusher with a spatula for pushing back the cuticle and a hatchet for removing pterygium;
- scissors with curved blades for trimming cuticles or a cuticle softener;
- a brush with soft bristles to remove sawdust;
- a set of brushes with synthetic bristles;
- clamp tweezers used for modeling arched nails;
- lint-free wipes;
- disposable lower or reusable upper forms;
- liquid for cleaning brushes from gel;
- 3 in 1 product for degreasing, disinfecting and removing the dispersion layer (or purchase separately: alcohol-based antiseptic, degreaser, sticky layer remover);
- dehydrator - nail prep (necessary only for high humidity of hands and nails);
- acid primer or ultrabond (ultrascoupling primer);
- gel base (if a three-phase gel system is used);
- structural gel (can be single-phase, two-phase and three-phase) or a set of colored gels for a jacket;
- finish gel (if a three-phase gel system is used);
- regenerating cuticle oil.
When choosing a gel for extensions, you should remember that nails made from this material can only be removed by filing. The exception is biogel, which can be removed by soaking, as in the acrylic system. For beginners who have no experience working with a cutter, it is better to start with such material, since there is a danger of injury when removing it. nail plate is reduced to a minimum.
When choosing the main components - lamp and gel, their compatibility should be taken into account. Thus, ultraviolet rays have a wide range of effects, so lamps with such radiation are suitable for almost any material, while diode devices are suitable only for gels marked LED. For beginners who have not yet decided which gel systems to work with, an excellent option would be to purchase a hybrid lamp that combines two types of radiation.
Table: differences between LED and UV lamps, their advantages and disadvantages
| Type of radiation | Light source | Materials that are polymerized in the apparatus | Average polymerization time of various materials | Total operating time | Is repair possible? | Harmfulness of radiation |
| LED | LEDs with a power of 3 W | Only new generation materials developed specifically for LED lamps with LED markings on the packaging. |
| Up to 50,000 hours of device life | LEDs are not replaceable. | The radiation is harmless. |
| UV | Fluorescent lamps 9 W each | Any materials, both marked UV and UV/LED |
| Up to 3,000 hours of operation. | Since regular UV lamps lose power and burn out over time, it is recommended to replace them every 3 months. | Ultraviolet radiation in this range dries the skin of the hands and has a harmful effect on vision. |
Photo gallery: tools and materials that will be needed for various extension methods
Files are the main working tool when extending and removing gel nails, so you should not skimp on their quality and quantity  Paper forms allow you to model nails of any configuration
  A metal pusher is necessary at all stages of extensions. Choosing a gel is an important step, so before purchasing it you should consult with a professional, and also do not forget about compatibility with the lamp. The upper forms have different widths and degrees of convexity, are reusable and can withstand up to 50 extension procedures. If you choose classic manicure, then you can’t do without cuticle scissors, but you can use them 3 days before extensions or after the procedure. Brushes with synthetic bristles are suitable for working with gel. To prevent a beginner from getting confused in liquids for removing dispersion, degreasing and disinfecting, you can immediately purchase the product , which has all three properties. Most extension gels dry only in UV lamps, however, such devices are short-lived and require constant changing of fluorescent lamps. Dehydration product will only be needed by those whose hands and nail plates are prone to moisture. LED lamps are considered to be a new generation of devices, they have high power and reduce operating time
  Bonder is the first thing you need for gel extensions. It creates a base for modeling and does not allow the gel to peel off
Step-by-step instructions for gel extensions on lower forms
First of all, you should prepare workplace. This could be a desk, near which there is a socket for connecting a lamp, as well as an artificial light source. It is important to avoid direct sunlight on the materials, as natural light also contains a small amount of ultraviolet radiation, which helps the gel harden. Therefore, after use, brushes should be washed in a special solution and stored in a case that prevents polymerization of residual material on the bristles.
Basic set for a beginner nail extension artist:
The extension procedure will require a lot of time and patience, so at home you can divide this process into two stages. First perform, for example, hygiene trim manicure, and then, after a break of at least 3 days, model your nails with gel. It’s better for yourself to start with your right hand and only after all the stages move to your left.
The first stage is preparing the nail plate
To properly prepare your nails for extensions, you should:

Since the gel tends to spread, you should not apply extensions to all fingers of one hand at once. At the subsequent stages of installing the forms and the gel extension itself, the described actions should be performed on each finger in turn, until the final stage - filing and design.
The second stage is the correct installation of the lower form on the finger
When modeling nails on the lower forms, you can use reusable patterns, as well as disposable templates made of foil paper with a sticky layer. Craftsmen prefer disposable forms, guided by their safety, ease of use and the ability to give the extended edge any shape. The result of the entire extension process depends on how correctly the shape was installed.
Sequencing:
- Remove the template from the paper backing and squeeze out the center along the perforations. Glue the remaining foil oval with reverse side template for additional rigidity. We tear off the upper petals, which will be attached to the finger above the nail, and round the template. We do not glue the lower ears together.
- We place the form under the free edge of the nail, trying on its placement. If the shape does not fit seamlessly with the natural nail and forms gaps, you should adjust the oval cutout to fit the “smile” line using scissors. It is important that the cutout is symmetrical to the center line that is marked on the template. If there are high side ridges that prevent the mold from fitting tightly to your finger, you can make two cuts.
- After trying on, remove the form and glue the lower ears so that their edges are symmetrical. If the ears are connected unevenly, distortions may occur during the extension process.
- We set the form again, placing its inner oval cutout under the free edge of the natural nail, and using the upper petals we secure it to the finger. We check the correct installation by looking from the side and from the end. If the edge of the template rides up or down, you can correct its position by moving or lowering the upper petals above the nail bed. So, by moving them apart when fixing, we lift the “nose” of the pattern up, and to lower it, we should reduce the distance between the petals on the finger.
- When the form is installed correctly, and its extreme point is parallel to the nail bed, we crimp the template for a more reliable fixation on the finger.
The wider the distance between the two upper petals on the finger, the higher the edge of the template is lifted, and, accordingly, vice versa
Since the diameter of the fingers and the shape of the nail plate are different for everyone, when installing forms it is necessary to select the distance between the petals on each finger individually.
Video: how to correctly set the shape when building up
The third stage - gel nail extensions
To model a nail, you need to take the following steps:

The stress zone is the highest point of the nail, created specifically in an artificial nail so that it is strong and does not break. And also so that the load is in the correct place of the nail bed.
Video: modeling nails with single-phase gel on lower forms
How to work with top forms
Stages of work when building up onto upper forms:

Video: gel nail extensions on top forms
What other options are there for extensions using gel?
In addition to the methods of nail lengthening described above, the gel system is compatible with such extension techniques.
Unfortunately, not all women are blessed by nature with strong and durable nails. This issue can be easily resolved, you just need to visit a beauty salon and use the nail extension service. This process can be done with your own hands. We will consider two types of gel extensions: on tips and forms. We’ll also briefly talk about the types of extensions in French style with visual photos. And, if you have no desire to visit salons, then our article will tell you about gel nail extensions step by step.
What to choose: forms or tips?
Nail extensions can be done using forms or tips. When there is a nail base on the finger, it is necessary to use tips. In order not to be mistaken in making the right choice, you need to take into account the width of the nail surface, what kind of bend you want to get at the end of the work and do not forget about the height of the nail hole. When we talk about using forms for gel extensions, we mean recreating from scratch the length and shape that you or your client prefer, not forgetting to take into account the structure of the nails and the size of the fingertips. When the type of work that suits your client has been chosen, you need to know that there are five types of nail structure:
- slightly convex;
- snub;
- flat;
- cat's nail;
- wavy.
The most common are cat's nail and snub-nosed nail growth.
"Cat's Nail"
Extension of cat nails should not be done using tips, since as the nail grows, its free edge will bend down. This will create a space between the tip and your nail, therefore allowing dust and water to enter. In this case, you need to use a nail extension form.

"Snub" nails
If you are working with snub nails and decide to do extensions on forms, do not be surprised that in the future the nails will lose their correct structure. And in this case it is better to use tips.
The final result of gel extensions also depends on the type chosen, one of which is used most often - three-phase gel extensions:
- Base gel
- Construction gel
- Finishing – gel polish coating

Nail extensions at home
In order for your work at home to be coordinated and complete, you will need to stock up on these tools; they can be purchased at ruNail:
- UV lamp;
- antiseptic;
- modeling agent - adhesive;
- the basis;
- degreaser - dehydrator;
- tips;
- forms;
- sculptor;
- clinser;
- flat brush;
- file 220/280 grit;
- file 240 grit;
- finishing gel;
- glue for tips;
- lint-free wipes;
- orange sticks;
- dust brush
- cuticle oil

Step-by-step instructions for beginners
Gel nail extension on tips:
- We prepare the nail surface using an orange stick: we peel back the cuticle, create the desired shape for the free edge, and polish the nail area with a file. rectangular shape 220/280 grit, it prepares nails for polishing, smoothes and eliminates scratches.
- Apply degreaser
- Apply a thin layer of glue for tips to the free edge of the nail and the places where the tips come into contact. You need to place the tip to the nail at an angle of 45 degrees, and lower it so that the line of the tip’s foot and the edge of the nail are aligned.
- Next, without disconnecting, carefully lower the tip onto the nail and spread the glue in the same amount over the entire area with rubbing movements.
- We place the tip again at an angle of 45 degrees, bring it to the stop line and, after hearing a crack, gently lower the tip onto the nail. You need to hold it for about 10 seconds.
- We shape the tips according to the client’s wishes, taking into account the structure of the nail.
- We get rid of dust particles and degrease.
- Apply modeling agent to the nail area.
- Using a slightly damp brush, apply the base gel along the entire length of the future nail and place your finger under the lamp for 1 minute.
- Using a flat brush, apply the sculptor, taking into account the structure of the nail. Leave under the lamp for three minutes.
- Using a lint-free cloth, remove the sticky layer with cleanser.
- Using a buff, we polish the area of the nail.
- Degrease and coat with finishing gel. Place your fingers under the lamp again for three minutes.


Below we offer you video tutorials on extensions:
How to extend nails with gel on forms
- We treat our hands with antiseptic.
- We clean the surface of the nail using a 220 grit file.
- Cover with degreaser.
- Next, cover with the base and place your hands under the lamp for two minutes.
- Clean the top layer.
- We attach the form.
- Using a brush, apply the gel, while turning your finger nail down so that the gel is evenly distributed.
- Place your hands under the lamp again for three minutes.
- Cover with gel again and form an “S” bend.
- After the lamp we clean the sticky layer.
- Getting rid of the form.
- Level the surface with a buff.
- We clean off the dust with a brush and cover it with finishing gel.
- Place your hands in the lamp again to dry for two minutes. Degrease the surface of the nails and apply oil to the cuticles.
Below we suggest considering step by step build-up in photos and videos:


Nail extension is a cosmetic procedure based on the use of tips, gel (or acrylic) and varnish. Properly made artificial nails can become a real decoration.
And yet, frequent use of acrylic or gel worsens the condition of the nails. For those who want to grow their nails without these products, a method using glue powder is suitable.
As an example, let's try to grow nails without gel and acrylic at home and look at the main nuances.
Quick navigation through the article
Preparation
Glue powder - new technology nail extensions using glue, powder and a transparent activator base. It provides a perfectly smooth nail surface due to easy adjustments. To do nail extensions without acrylic and gel you will need the following:
- A set of tips (it is better to purchase them in specialized salons);
- Glue (usually included with tips);
- Tweezers, file;
- Glue powder;
- Activator;
- Nail polish.
Extending nails at home
If you spend enough time doing your own nail extensions, the results will exceed your expectations. It is important to follow the following instructions:
- Clean your nails of any cosmetics;
- Trim excess nails as close to the base as possible and file away any uneven surfaces;
- Then glue the tips to your nails and trim them to the desired length. Wait 5-10 minutes;
- Now that the tips are securely attached to the nails, begin to cover them with a special adhesive composition;
- Apply the glue one at a time and also dip your nails into the powder (strictly one at a time, otherwise the glue will dry out and the powder will not stick);
- Once all the tips are covered with powder, you can apply the activator;
- After this, feel free to paint your new, strong nails with any cosmetic product.
Extending nails using glue powder takes 30-40 minutes. The tips will not last too long, so this method is relevant before an important meeting, photo shoot or fashion show.
Nail extensions at home are a hot topic for lovers of fashionable nail designs. Every woman who looks at this page wants to be beautiful and well-groomed, to feel confident, emphasizing and complementing her image with an exquisite manicure.
The desire to grow nails at home, as a rule, is associated with a lack of time, money, simple human interest, or - “I’ve been doing nail extensions for five years from a master, I’ve seen everything, I can handle it myself...”. In any case, before you get down to business, you should read about the details and nuances of extensions, so as not to harm yourself and enjoy not only the result, but also the process.
Nail extension technologies
There are two main materials used for extensions:
- Gel nail extensions.
- Acrylic nail extensions.
False nails are nothing more than a plastic plate, which is given a shape that allows you to imitate natural nail. The difference between acrylic and gel is the hardening process itself.
Acrylic polymerizes (i.e. turns into a solid polymer) by mixing the monomer and powder, while the gel has these two components in its composition, but is presented in liquid form and hardens only under ultraviolet rays. Each of the materials has both pros and cons.

Technologies do not stand still; these days, gels have become available with a fairly thick consistency that does not spread and at the same time does not harden instantly like acrylic.
Thanks to this, it will be easier for a beginner to work with gel. Also, acrylic is less transparent; they will not be able to decorate the nail with the so-called “aquarium”.
But it’s not without reason that many craftsmen prefer acrylic? Of course not! Such clear lines and shapes as can be acrylic nails, is very difficult to achieve with gel.
But the latter has undeniable advantages. The monomer used in the acrylic system has a pronounced odor - toxic and volatile, spreading throughout the room and beyond in seconds.
In this regard, in beauty salons, acrylic nail extensions are allowed only if there is a separate room equipped with a powerful hood. At home, especially if there are children in the house, this will also become a hindrance. The gel does not have a strong odor and is easier to work with.
Nail extension methods
Today, the most common two main methods of extension are: for tips And on forms. Moreover, the latter are used less and less and have not gone into oblivion only because of the ease of working with them.
Nail extension tips speed up the work process by half, but as a result, artificial nails lack the grace, variety and strength inherent in nail extensions. The molds also allow you to create an artificial nail from a natural plate by clamping the material with tweezers, but more on that later.
What do we need for artificial nail extensions?
First, it’s worth talking about the tools and their features. The first and necessary thing is, of course, an ultraviolet lamp. Its presence is mandatory, no matter how nails are extended. If your nails are acrylic, it will only be useful for drying the topcoat, and here a budget lamp consisting of just one element with a power of 9 W will be sufficient.

The same tool is enough for gel extensions, if you plan to use only transparent material. If you want to experiment with French or any colored gels, you should purchase a more powerful lamp, with four elements with a performance of 37 W.
Also during the work you will need:
- A spatula for pushing back the cuticle. As a rule, this is found in every woman’s manicure set.
- Files - for acrylic you will need a harder file with a grain size of about 80 grit, for gel 100 grit is enough.
- Molds or tips + glue;
- Brushes for acrylic - natural drop-shaped, or for gel - artificial flat;
- If molds are used, you will need tweezers.
Having the above tools is halfway there. All that's left to do is purchase necessary materials and preparations- there are not many of them:
| Necessary materials and preparations | Gel | Acrylic |
| Disinfectants. Recommended drugs are “Batsilol” for instruments and “Cutasept” for hands. | + | + |
| A dehydrator is a liquid that dries out the nail plate. | + | + |
| Primer - provides reliable adhesion artificial material with a natural nail. | + | + |
| Bonder is a starting drug. | + | - |
| Construction gel. | + | - |
| Acrylic Powder. | - | + |
| Monomer. | - | + |
| Finish coat and adhesive remover (if any). | + | + |
IMPORTANT! The first item in the table is dedicated to disinfectants for a reason. Under no circumstances should you skimp on them or ignore them altogether. After all, a natural nail covered with gel or acrylic does not have access to the external environment.
All microbes and bacteria located on the nail plate during extensions will have an excellent chance to multiply and multiply at their discretion. In this case, what the nail will look like after removing the artificial coating is not difficult to guess.
It's time to dispel the myth about the harmfulness of extended nails! Extensions are no more harmful household chemicals, which injures the skin and nail plate every day. But, following the rules for disinfecting hands and tools when doing extensions is taboo. Simple negligence is enough to cause problems for several years.
You can buy all of the above tools and preparations at specialized points of sale or online stores. The purchase price in the latter is usually cheaper. The main thing is to make sure that the products you buy are original. Also, there are special kits for sale “for extensions at home.” It is better to consult a sales consultant about what to give preference to.
Existing forms of artificial nails
Having everything you need, having determined a more acceptable method of extension for yourself, you can choose the shape of your future nails and get down to business.

Today there is a wide variety of them, here are the most common:
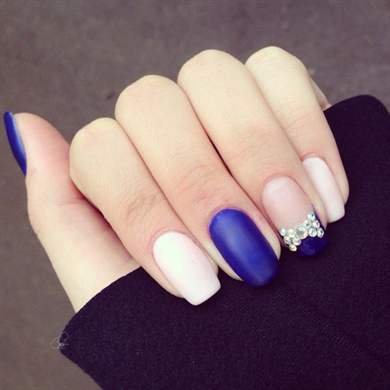
classic shapes: oval, almond, square and soft square;
more complex and modern: stiletto, pipe, bridget, edge.
Nail extension technology using tips
To begin with, you should pay attention to a more simplified version of nail extension - tips. If you have the desire and everything you need, everyone can achieve such nails on their first try. So, let's get to work!
The first, as mentioned above, is disinfection. Having processed the tools, you can begin preparing the tips. To do this, lay them out in front of us in order, choosing the width artificial nail corresponding to natural. Afterwards, the tips are given the selected shape. Now let's focus on the classic square.

The false nails are ready, all that remains is to prepare the natural plate, which is also not at all difficult.
Using a metal spatula, carefully move the cuticle and a fine-grained file 100 grit We remove the shine of the natural nail and its length.
At this stage, the main thing is not to overdo it, so as not to damage the nail.
Manicure should be done three days before extensions, or immediately after it. Delicate skin after treatment is very easy to injure with a rough file. There's nothing attractive about bleeding fingers.

We treat the prepared nails with cutasept and dry them with a dehydrator. That's all, you can glue the tips. Apply the glue carefully, in small quantities, evenly distributing it over the surface with the tip of the tube.
When applying the tip to the nail and making sure that it is positioned correctly, you need to press the artificial plate tightly against the natural one and hold it there for some time.
The glue sold in specialized stores is an analogue of a surgical preparation and has antiseptic properties. In case of breakage of an artificial nail, which often happens, and as a result, injury to a natural one, you can safely apply it to the wound. The glue will stop the bleeding and heal the wound, relieving pain.

Thus, after gluing all 10 nails and waiting for some time, you can continue. The next step is to apply primer and bonder (in a gel system) to the natural nail.
The bonder is dried in a UV lamp for 2 minutes, it is very important not to overdry it - this will not have the best effect on the durability of the nails.
Now we have come to the main stage - applying construction gel (acrylic) to the prepared nail. Whether the extended nails will provide aesthetic pleasure or will only add hassle by constantly breaking will depend on how correctly the shape of the nail is formed.

Nail art masters have a secret of subtle and strong nails. To create them, it is important to determine the stress zone of the natural nail plate. This is approximately its center.
At this point there is always more material than on the rest of the surface; towards the edge of the nail its amount is completely reduced to a minimum, in order to avoid an unnatural, too thick shape.
Observing this condition, we distribute the material over the nail plate and, if it is a gel, polymerize it under UV rays.

By repeating the procedure on all 10 nails and removing the sticky layer, you can bring the shape to perfection, removing all errors with a file.
Now the best part is to cover the finished nails with the finishing gel, dry it in a lamp for 2 minutes and evaluate the results of your work.
Technology of nail extension on forms
We have already learned how to extend nails using tips. The process of extension onto forms is much more painstaking and requires a certain skill, but at the same time, the result is more impressive.
So, preparing the nail plate is no different from what we already know, but instead of tips we prepare a form for extension.

The form is a pattern that allows you to create the perfect model for each nail individually. The form is carefully folded in half and placed under the nail plate, secured with a sticky edge.
The material distribution procedure is repeated according to the same pattern, taking into account the stress zone. But there is a nuance in extensions to the form, which has already been discussed. Thanks to ordinary metal tweezers, you can make the extended nail more refined and elegant by squeezing the not completely hardened material on the sides. Otherwise, the two extension systems are no different from each other.
Covering your nails with gel polish is a gift for modern women.
Despite the fact that the description of acrylic and gel extensions took only a couple of paragraphs, in practice everything is much more complicated; coating nails with gel polish is a completely different matter. This discovery has become a salvation for thousands of modern women. A manicure that decorates hands for up to three weeks has saved the female half of the population from many problems.

But the main thing is that the technology for applying it is so simple and familiar that any fashionista can cope with this simple task. Well, what girl didn’t paint her nails with polish? Here, the same thing, with the only difference that the gel polish dries in a UV lamp for 2 minutes. The coating consists of three stages of base, color and finish and will take no more than half an hour. And the palette is replete with a huge variety of colors for all seasons and occasions.
Care for extended nails
How to care for false nails? It’s not difficult at all! It is enough to rub a special nourishing oil into the cuticle area every day, and periodically coat the nail with colorless varnish. This will give the manicure freshness and well-groomed, hiding the effect of an overgrown nail that requires correction.
Perhaps now, having become familiar with all the nuances of nail extensions, you have lost the desire to spend a lot of time on experiments and, having made an appointment with a specialist, you went to manicure. Or maybe, on the contrary, having found all the answers to the questions, they set to work with zeal. One way or another, the main result is short-cut natural nails, covered with colorless varnish, much more impressive than unprofessional and crudely extended ones.
Always be beautiful and remember that nothing can emphasize you more feminine beauty like neatness and naturalness.
Nail extensions are one of the most popular personal care procedures today. Many girls dream of graceful and neat fingers. Beauty salons and manicurists help them with this. But you can do the extension yourself. To do this, you need to study the technique of performing the procedure and buy the necessary materials.
- on tips;
- on forms;
- with application of material to the nail;
- using a special mold;
- on liquid tips.
Tips are special plates made of plastic. They are glued to the nail, given the required length, and then gel or acrylic is applied. Color varies from transparent to white. The shape is selected individually with the help of a master. The advantage of extensions using tips is that only a small part of the nail plate is involved in the procedure. Thanks to this, its harm is minimized.
When applying extensions using tips, the drawing is done after attaching the plate to the nail
How to use iodine for beauty and health of nails:
The forms are disposable paper based. On the outside, it is coated with a special gel that prevents the applied material from sticking too firmly to it. Inside there is a composition on the base, thanks to which the form is well attached to the surface. Too much short nails are not suitable for such a procedure.
Extension using a paper form is one of the simplest methods of performing the procedure.
Extensions with material applied directly to the nail are suitable for brittle nails, prone to delamination.
- Acrylic is applied to silicone molds on the inside.
- The plate is applied to the nail and held for about a minute.
- The mold is released and left for 120 seconds. If gel extensions are used, the silicone plate is held for several minutes under a UV lamp.
- Using a file, the nail is brought to the desired look.
This procedure is used not only for extensions, but also to strengthen nails.
Silicone forms for extensions can only be purchased in a specialized store.
Extensions can be done using a special mold. This nail initially has a decorative surface; you don’t need to paint anything on it.
Decorated nails are very convenient to use because they do not require additional effort during the procedure.
For extensions using liquid tips, forms can be made independently from acrylic or gel. The plate is applied to the nail on 2/3 of the surface. Otherwise, the technology is the same as when using silicone molds.
Time taken by the procedure
Depending on the design and professionalism of the artist, extensions can last 2.5–3.5 hours. Of course, everything is individual. If the nails initially require serious treatment, the procedure may take 4 hours.
How long do extended nails last?
The length of time the plates last is always individual. It depends on the speed of nail growth, proper care and your lifestyle. Usually after a month it is necessary to make a correction or remove the forms. If nails grow too quickly, the procedure should be performed twice as often.
With regular correction gel nails last up to six months.
Rules for caring for extended nails:
- protect your fingers from sharp blows;
- visit the specialist on time to make a correction;
- use nail polish removers without acetone;
- apply the base before covering your nails with varnish;
- use gloves when washing dishes, laundry and cleaning;
- Protect your nails from exposure to high and low temperatures.
When cleaning, be sure to wear gloves if you have extended nails.
It is also worth taking into account the following factors: exposure environment and quality of materials. If the master used cheap components when working, it is unlikely that your new nails will please you for a long time. The following specialist errors can also reduce wearing time:
- incorrect preparation - a primer or bonder was not carefully applied, a dehydrator was not used;
- distorted sequence of application of products or inappropriate layer thickness;
- drying too long or too quickly;
- improperly formed nail arch;
- unsealed free edge.
You should be careful about what you do with your own hands. Try not to touch the zippers when fastening, do not click your fingers on the table and do not type on the keyboard too often. Even minor impacts can cause nail breakage.
Table: pros and cons of extended nails
Nail extensions at home
To carry out nail extensions at home, you need to know certain rules, stages of the procedure and other nuances.
Basic rules for nail extensions
In order for extended nails to last longer and the procedure to be safe, it is important to adhere to the following rules:
- do not use hand cream on the day you decide to get your nails done;
- before extensions it is necessary to clean the cuticle;
- do not forget to take mineral and vitamin complexes to minimize the harm from the procedure, Special attention give calcium;
- before applying gel or acrylic, it is necessary to degrease the nail using a special product for maximum bonding;
- choose a design that suits both everyday look, and to the publication.
Preparing for extensions
Both the professional and the client need to wash their hands thoroughly. After this, the palms are treated with a disinfectant. Then you need to soften and push back the cuticle. As a rule, it is not completely cut off when adding extensions, as this can lead to wounds and cuts.
One of the stages in the process of preparing a nail for extensions is pushing back the cuticle using an orange stick or other device.
Now, if necessary, you need to shape your nails.
Before extensions, nails must be treated with a file.
When preparing a nail for extensions, you first need to remove the fatty film from the surface, as well as remove moisture and dirt. This can be done using a cotton pad and an alcohol or acetone based product. Then you need to treat your nails with a polishing block. It's better to start with the little finger right hand, because after half an hour the protective layer forms again. The nail should be treated in the direction of its growth, otherwise the structure of the plate may be damaged. After this it remains final stage- disinfection. To implement it use special means, due to which the surface is also degreased.
Also during preparation it is necessary to decide on the shape of future marigolds.
Depending on personal preferences and the initial condition of the nails, you can choose the appropriate shape
Video: preparing natural nails before extensions
Stages of build-up
Let's look at the most popular types of extensions: with tips, with forms, and with the material applied directly to the nail.
On tips
- First, prepare for extension, which is described above.
- The inner surface of the tip is treated with special glue.
- The plate is applied to the nail and pressed firmly with your fingers for 15 seconds.
- Excess glue is removed.
- The plates are cut to the required length and filed to the desired shape.
- Using a file, the lines where the plate joins the nail meet are cleaned, and the surface is treated with a buff until the shine is visible.
- Apply a primer that models the gel and distribute it over the plate.
- Turn your hand over to level the solution.
- The nail is placed in a special lamp.
- The gel is reapplied and dried again.
- A cotton pad is moistened in a special solution and the sticky layer on the nail is removed.
- The top layer is polished with a file and a polishing block.
- Apply the last layer of solution and dry.
Video: gel nail extension on tips
On forms
- Perform preparation, the main stages of which are described above.
- Apply the base solution.
- Dry the nail plate in the lamp for about two minutes.
- Remove the base coat.
- The form is applied to the nail to check if the center is even.
- The plate is clamped using special devices and secured to the nail.
- Using a brush No. 6, carefully apply the gel to the surface. There should be a maximum in the center of the solution plate.
- Turn your finger over so that the gel is distributed.
- The nail is dried in a lamp.
- Apply another layer of solution.
- The nail is turned over again and then dried in a lamp.
- Use a special product to degrease the surface of the nail.
- Using a file, give the plate the required shape.
- Using a sanding block, uneven surfaces are removed.
- Apply the last layer of solution and dry the nail in a lamp.
- Degrease the surface.
Video: gel extensions using paper forms
By applying the material directly to the nail
- The build-up begins with the preparation described above.
- A suitable plate is selected for each nail.
- A special gel is placed in the center of the mold.
- Dry the mold in a lamp.
- Apply a little solution to the cuticle.
- The mold is applied to the nail at an angle of 45 degrees.
- Dry your finger in the lamp.
- Remove excess gel.
- Dry the nail in the lamp again.
- The form is carefully removed.
- Using a special solution, remove the sticky layer from the nail.
- Use a file to give the plate the desired shape.
Video: extensions with applying material directly to the nail using silicone forms
Extension for the first time
The main thing for getting extensions for the first time in your life is choosing the right specialist. After visiting a professional, you will have an exceptionally good impression of the procedure. If you decide to do the extensions yourself, try to strictly follow the instructions. The main thing is to thoroughly disinfect tools and hands to avoid unpleasant consequences.
Base extension
Using a base coat, you can build up your nails. The technology is no different from that described above. The stages of the procedure in this case will be similar to extensions using tips. The base adheres firmly to the nail, and can be dissolved in the future only by soaking in a special solution.
Base nail extensions are not much different from classic ones
Building up for yourself
To carry out the procedure at home you need to buy:
- file;
- polishing block;
- tips;
- disinfectant liquid;
- means for degreasing the nail surface;
- brushes;
- ultraviolet lamp;
- acrylic paints.
This list is relevant for extensions using tips. For other types of procedures, you must additionally purchase the following tools:
- for - special plates;
- with application of the material directly to the nail - silicone forms;
- using a special mold - ready-made decorated nails;
- for liquid tips - prepare or buy special forms from acrylic or gel.
Be extremely careful and remember: do not wet your hands for half an hour after the procedure.
The process of removing extended nails
It is better to go to a salon to remove extended nails. But if you still decide to do it yourself, you will need:
- tweezers or nail scissors;
- acetone;
- cotton pads.
First you need to shorten your nails. To do this, you can use tweezers or nail scissors.
Before removing extended nails, you need to shorten the plates
Then soak cotton pads in acetone and apply to your nails. Cut small pieces from the foil and wrap them around your fingers. This is done in order to avoid intoxication with acetone vapor.
After 10 minutes, remove the foil and remaining acrylic from the nail. This can be done using a file. If you need to remove the gel, you will have to work longer. It is not necessary to cut down the material completely. The gel strengthens your nails and is unlikely to interfere with your usual activities.
When removing extended nails, wrap them in foil to avoid inhaling acetone fumes.
Don't forget to use a polishing block at the end of the procedure. It is also necessary to lubricate your hands with cream to prevent dry skin.
Remember that under no circumstances should you rip off your extended nails. This way you can damage yours.
After removing extended nails, be sure to use a polishing block.
Errors when building up
When building up, it is important to avoid mistakes that could affect appearance and nail health:
- excessive nail filing; When sanding the surface, some masters use too hard tools, because of this the nail can become very thin and turn red; if you do the extensions yourself, make sure that the file is as soft as possible;
- improper removal of extended nails; often craftsmen cut off the plates completely using a rough file; this should never be done, as this can lead to damage to the nail; it is necessary to use a soft file and leave a little material on the surface;
- incorrect modeling; if during the extension process you do not take into account the parallelism of the lines and other indicators, in the future the plates may break and the nails may be injured;
- failure to comply with correction deadlines - it is recommended to visit a specialist once a month; the natural nail grows, so the extended one can bend down, which looks unaesthetic;
- insufficient disinfection; you cannot do extensions on nails that are affected by fungus; before the procedure, you must disinfect the hands of both the client and the artist,