How to make a badge with your own hands - making options (simple and complex). How to make a pig with your own hands: step-by-step master classes with photos Paper craft
Badges are one of the most popular youth accessories. Each such product contains some information about its owner. An icon can tell about personal hobbies, values, musical preferences, affiliation with an organization, or attitude towards life.
There is no doubt that a fancy badge can be bought in a store. But a thing made in a single copy is always a priority. Its value lies in the fact that it is unique. No one else will have one like this! Are you ready to express yourself out loud and show your friends what you are capable of? Then hurry up see how to make badges at home. Some ways will really surprise you!

Making a paper badge
Most easy way make a badge - make it out of paper. Paper badges, medals and badges are often used during school Olympiads, sports competitions and children's parties. Young fashionistas also love to create them. And all because making badges from cardboard does not require special materials or special skills. Just paper, a hairpin and a rich imagination!

Cut out from a magazine, print or draw a picture of the desired size. Glue it onto a piece of cardboard. A sticker would also work well as a picture.

To make the badge last longer, cover it with tape on both sides or laminate at any office supply store. You can also add a glossy shine to the icon using wrappers for a notebook. Place the picture between two pieces of wrapper, sealing the edges using an iron and parchment.
That's all! The paper badge for your clothes or favorite bag is ready. A hole punch and a thin rope can easily turn it into a stylish keychain.
Still have questions? How to properly make a paper badge and attach it safety pin, the video will tell:
Ice cream and hamburger made. What about cat or cloud keychains? Let's see!
If a special event is approaching - a name day, family celebration or a children's party, cardboard badges can be easily decorated with lace, sparkles, rhinestones, beads, satin ribbons.

Paper badge can be covered epoxy glue. Glue the picture printed on thick paper onto a cardboard base and let it dry. Attach the chip to a plasticine stand and apply glue in two stages: first, a thin layer, distributing the glue over the entire area of the picture, then add a few drops of glue - they will spread over the chip and make the icon convex.

How to make plastic badges in the oven?
Oven icons - unexpected, right? But how beautiful! Tell me, where do you put disposable plastic containers for cakes, salads or cookies? Don't rush to throw them in the trash, better put them in the oven. Two minutes - and a small miracle will manifest itself.
To make plastic badges in the oven you will need:
- Plastic container,
- scissors,
- hole puncher,
- colored permanent markers.
Using scissors, cut out a smooth and even part of the plastic packaging.

Place the selected design underneath and use a marker to transfer it to the plastic. Paint it over. Make a hole on top with a hole punch and cut out the picture along with the loop, retreating a few millimeters from the edge.
Attention! The pattern should be large enough, because during baking it will shrink several times.


Preheat the oven to 160°C. Place the dough on parchment paper and keep in the oven for 2-3 minutes. As it heats up, the picture will begin to shrink and bend, so you can slightly flatten it with a fork.
Carefully! If you suddenly forget the safety rules while working with a hot oven, you can get seriously burned. Ask adults for help.

After baking, your badge will become strong and smooth. Make several similar badges and put them on a thin metal chain. You can do it wonderful bracelet or cool keychain for a portfolio.


Badges can also be easily made made of plastic buttons. Apply an image or ornament acrylic paints and cover with nail polish. Ready!

Masters in making badges manage to cover the plastic base with embroidered designs, tying them at the back with thread. The work is painstaking and requires the use of special tools and the ability to embroider with satin stitch.

Wooden badges are the hit of the season!
Stylish, elegant, and most importantly - environmentally friendly! This is why wooden badges are popular among young people. Do you also want an exclusive mini-brooch? We'll have to work!

To make a wooden badge for clothes, prepare:
- round flat wooden blanks,
- acrylic paints,
- safety pin,
- glue gun,
- simple pencil,
- water and a brush.
Making wooden badges should start with a sketch on paper. You can draw whatever your imagination whispers - ice cream, elephants, bunnies, and so on.

Now, using a simple pencil, transfer the image onto a piece of wood about 5–8 mm thick. They are sold in craft stores.
It's cool if you know how to work with a chisel, or burn patterns on wood (this is often taught in labor training classes). Then the surface of the icon will become textured, and the contours of the image will be clearer.

Draw your intended image with acrylic paints. Once the paint is completely dry, use a glue gun to attach a safety pin. Cover the badge with wood varnish.
The stylish decoration is ready.


When making wooden badges, they often use Additional materials- threads, beads, pieces of fabric.
DIY metal badges
Creative do-it-yourself metal badges are made on the basis of old ones that have already lost their relevance and are not popular with their owner.
To decorate your clothes with a metal badge, prepare:
- old metal badge,
- stationery knife,
- acrylic paints,
- pieces of cloth or napkin.
Take an old iron badge and take it apart using a utility knife.

This is what the workpiece will look like.

Paint the badge with light acrylic paint in two layers. When the paint dries and becomes tacky, cover the badge with a small piece of tissue paper.
Pay attention! If there is too much paint, it will ooze through the napkin and ruin the badge.


Fold the edges of the napkin inward and cover the badge.

The final result depends on the image on the napkin. These could be pirates, heroes of your favorite cartoons or fairy tales...


DIY acrylic badges
These original pins will look like they came straight from a store shelf. To make an acrylic badge with your own hands, you need to purchase a special blank. It can be found in any office supply store.

The workpiece consists of a body and fastening. All you need to do is cut out the image and place it between the base of the badge and the transparent cap. To prevent the image from scrolling, apply reverse side a drop of glue. Everything about everything - one minute!

Congratulations! Now you know not only the technique of making badges, but also how to make a keychain with your own hands. After all, with the help of a hole punch, a wood burning device or a regular soldering iron, the icon can easily turn into a pendant. However, do not forget about the help of adults. Only under their supervision can you work with electrical appliances.


A yellow earthen pig, made with your own hands from the most affordable materials, will definitely bring good luck for the entire coming 2019! Don't believe me? So, you need to test the power of such a homemade amulet in practice!
What can you make a symbol of 201 from with your own hands? From everything you can get your hands on! This craft is a great opportunity to work with your favorite base for creativity or get acquainted with something new and interesting.
Paper plate pig
For example, you can turn a disposable paper plate into a cute pink or yellow pig. Just cover it with paint in the desired color, stick on a funny face, ears, paws and a tail with a crochet hook - and the pig is ready! You can give this craft a more formal look by using ready-made toy eyes.

You can make the pig long legs with hooves.

“The version with a pig made from paper plates is perfect for the littlest creators!”
And it will be even more interesting if you make the pig not smooth, but soft and fluffy! What is needed for this? Still the same paper plate and cotton balls. Glue them onto the surface of the plate and cover with pink paint.

Let's dry it. We make a twisted tail for the pig from fluffy wire.

Then glue the paper eyes, ears, snout and tail onto a paper plate. Ready!

Symbol of 2019 paper pig
You can make a pig in the form of a stand. All you need is a couple of old wooden clothespins. We glue the piglet itself from cardboard, make the tail from the same chenille wire, but the legs are made from clothespins, which must first be painted with pink paint. It turns out simple and cute! If desired, you can place congratulations and wishes for loved ones on this stand.

You can make a three-dimensional symbol of 2019 with your own hands from paper strips. We turn them into a ball body, and glue a paper head on top. Don't forget about the fluffy tail!

Watch how to make an adorable pig out of stripes in the video:
A pig made from stripes is a hit in New Year's crafts for 2019! It is simple to implement, does not require large expenditures and looks very impressive.
Children will definitely love the pig mask. It is easy to cut from pink cardboard or thick colored paper.

Paper mask “pig”
Pig made from plastic eggs
As a gift to friends and to decorate a small Christmas tree, you can make small souvenirs in the shape of piglets. Cut out the legs, tail and face from cardboard. We take as a basis empty plastic containers from chocolate eggs with a surprise.

Glue the paws to the Kinder Surprise.

Using a pencil, we make a curl ponytail out of paper.

Glue on the muzzle. The pig is ready!

You can just glue it to plastic containers ears and draw faces on them.

Place these pigs in an egg container, and let each guest take the one they like as a gift. Inside each of the pigs you can place a delicious candy or a holiday wish!

Pig quilling on a foam egg
This pig is very easy to make, and the result will surely please you. You can buy a foam egg at craft stores. First we need to paint the egg pink.

We twist pink rolls from a special pink ribbon for quilling. Fix the tip with glue.

When the paint on the egg dries, glue the rolls to it.

Glue orange and pink quilling tape together. Give the colored roll a teardrop shape. These are the future ears of our pig.

Glue on the ears. Glue the orange roll legs. We glue the nose with a button and factory eyes. Our pig is ready!

Quilling pig - symbol of 2019
Pig from a cardboard box
For a large Christmas tree, you can make a toy - a pig from cardboard box– for example, breakfast cereal boxes.

We cut out the legs on it and paint it pink.

We assemble the head from cardboard parts and glue it to the cardboard body.

If you leave the box open, it can be used as packaging for New Year's gifts or as a stand for various treats.

Piggy bank made from a cardboard roll (video)
This craft will be a wonderful souvenir for the New Year. May this pig bring wealth and prosperity to its owner.
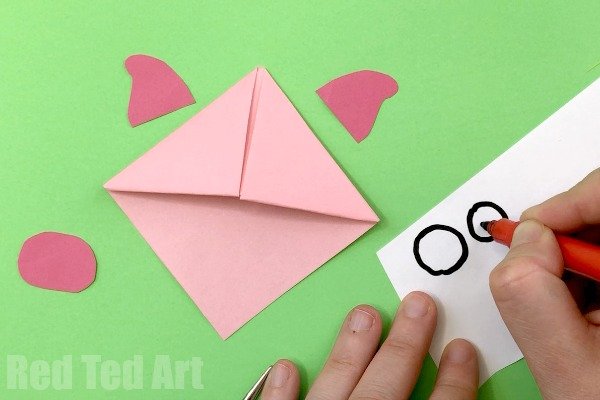
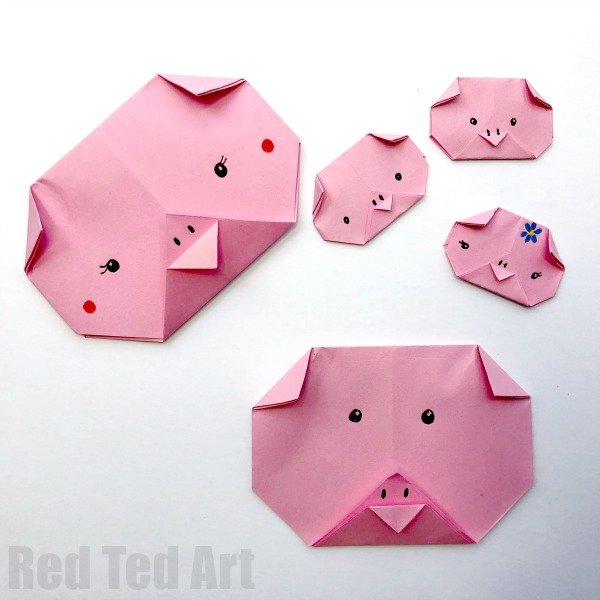
Pig head made of paper (origami)
The easiest way to make a pig for the New Year is to make it out of paper using the origami technique.

We bend each side towards the center.

We straighten the workpiece and fold it across.

Fold the sides towards the center and bend the top.

We turn the corners out and press them. We will get a figure that resembles a fungus on a leg.

We lift two corners up.

Fold the bottom corners to the center line. We bend the bottom corner in the center and press it thoroughly.

Bend the bottom end again.


We turn the bottom part up.

We turn it over and bend the corners (these are the pig's future ears).


Draw a snout for the pig and glue on the eyes. The pig's face using the origami technique is ready!

Pigs made from plasticine, dough and modeling mass
A gentle round pig can be molded from plasticine or modeling mass.

Watch how to make a pig out of plasticine in the video:
The salted dough makes a very tender New Year's angel pig, which you can give as a New Year's gift or decorate your Christmas tree.

Vegetable piglets
Perhaps the cutest piglets come from vegetables, such as potatoes and carrots. For this craft, you should choose small pink potatoes and small carrots. We also stock up on toothpicks.

Cut a round patch from a carrot cut. Cut out triangular ears. We secure these parts with toothpicks.


We attach rectangular parts to them - legs.

Using glue, glue the eyes. They can be made from peppercorns. The pig is ready!

We make an impromptu farm from a cardboard box and cut up paper. You can decorate the farm with a trough of cereal and spruce branches. All that remains is to place our pigs on the farm. Children will surely enjoy caring for the charming residents, feeding them and putting them to bed.

Instead of a box, you can use a plastic bottle as a base. We paint it pink with acrylic paint.

We glue the legs from strips of cardboard.

Cut out ears from cardboard and glue them to the bottle.

Glue on paper eyes and a snout! Pig from plastic bottle ready!

See how to make a whole family of pigs out of plastic bottles:
Pig made from a small plastic bottle and yarn
You can not paint the bottle, but wrap it with twine or colored yarn. It’s good to use small drinking yogurt bottles as the basis for this craft.

We take soft peach yarn or Pink colour.

We wrap the bottle with threads, fixing them with glue. When the bottle is completely wrapped, glue on the felt patch and ears. Glue paper or factory eyes. We'll make a wonderful New Year's souvenir!

Pig from a painted plastic bottle
You can use only part of the bottle by cutting off the top part.

Paint the bottle with acrylic paint. Glue on the tail and ears.

We make a muzzle for the pig, glue on the eyes and snout. Such a pig can become a New Year's bowl for candies or a stand for a gift.

You can make an adorable piggy bank out of a plastic bottle. The top and bottom of the box are made from the bottom of a bottle. The halves are fastened together using a zipper.

Piglets made from pompoms and threads
An original pig will be made from fluffy pink pompoms and foam rubber. From foam rubber (foamiran) we cut out the ears and legs of the pig.

Glue two pompoms together (they are easy to find at a craft store). Glue on the ears and legs.

We glue factory-made eyes and a snout nose to our pig. We've got an adorable little pig!

Pigs made from homemade pompoms and felt
You can make your own pompoms from pink yarn. It's not difficult at all, it just takes a little practice. Cut out two identical circles from cardboard with holes inside. We make an incision on one side.

Place two circles together and begin wrapping with yarn.

When the entire circle is wrapped in yarn, insert a thread into the holes on both sides, trying to secure it between the leaves of cardboard. Using nail scissors (driving them between the cardboard circles) we cut the threads. We gradually move the thread that we inserted between the circles behind the scissors.

When all the threads in the circle are cut, we tighten the thread that we led between the circles. We should now have a pompom.

Glue pink ears, legs and felt arms to the pompom.

Glue the oval patch.

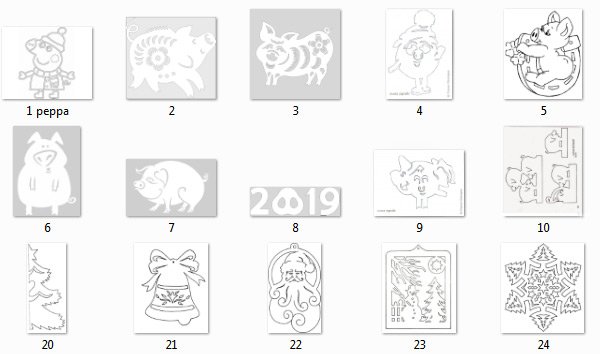
We sew two-layer caps from red felt. Patterns for crafts are at the end of the article.

We make an edge for the caps from white felt.

The pompom pigs are ready! You can even attach a small ribbon and hang them on the Christmas tree.

The symbol of 2019 is a yellow pig, so the New Year's pig can be made in yellow or beige.

Watch how to make a pig from pompoms in the video:
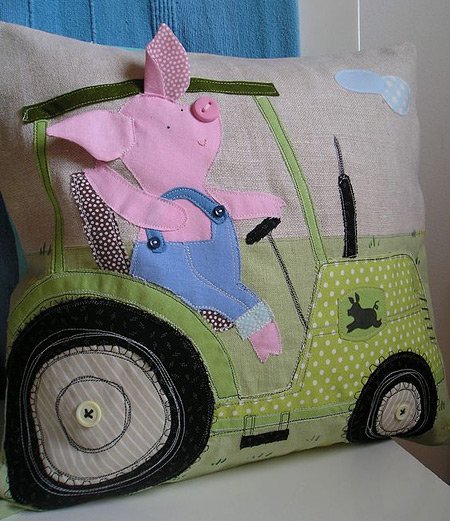
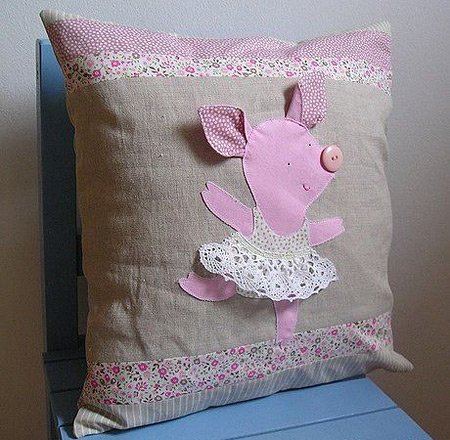
DIY felt and fabric pigs
Or you can simply sew souvenirs in the form of felt pigs!

If you attach a special lock for keychains to such piglets, we will get a wonderful New Year's souvenir.

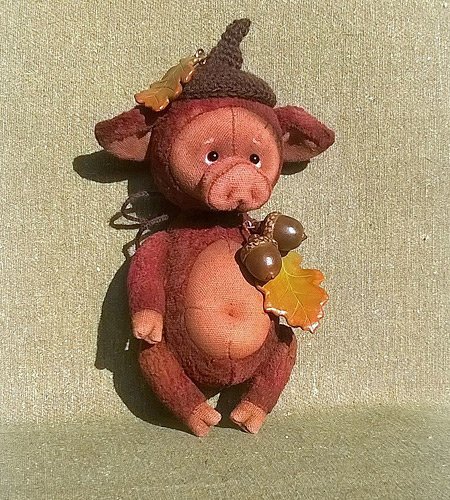
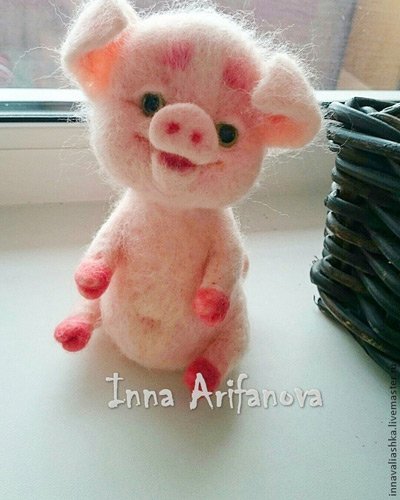
A soft, gentle pig made of felt and fabric will not leave anyone indifferent.


And of course, our beloved craftswomen couldn’t help but make our favorite children’s cartoon character - the adorable Peppa Pig.

Drawing of a pig for the New Year
You can draw a New Year's pig. First we make a pencil sketch.

We color our drawing with yellow watercolors and water.

We paint the surface on which the pig is standing with blue.

We color the pig's eyes, snout, and mouth. We outline its outline brown. We color the gifts and the bow. We paint snowflakes with blue paint.

Such New Year's picture can be a great decoration New Year's cards. You can put the drawing in a frame and hang it on the wall - may it bring good luck in the new year!

Soap "pigs" as a gift for the New Year:
You can go through endless options for how to make a pig! Just imagine how you see this symbol and start making it a reality!
Pig - symbol of 2019 (ideas from the Internet)
At the exhibition of New Year's crafts in kindergarten you can find a whole treasure trove of ideas for crafts with pigs.

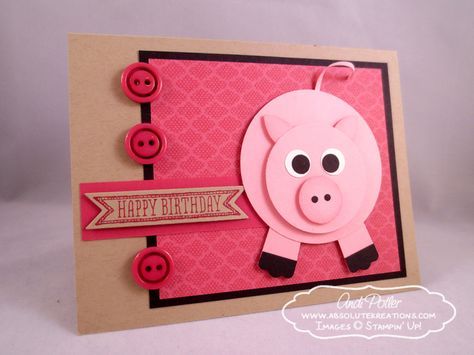
Pennants. It was not so easy to get them. And today, thanks to the development of technology, you can make them yourself. Knowing how to make a badge with your own hands, you can make Original gifts friends and do comic medals for the holidays, and establish your own production of products self made.
Manufacturing methods
How to make a badge with your own hands at home? It depends on what skills and materials the master has. The most simple options- cardboard icons. Wooden models are also easy to make, but you will have to tinker with metal ones - these are some of the most difficult options.
Cardboard, paper, fantasy
Before you make a badge with your own hands, you should decide on the theme. For weddings, anniversaries, school competitions and children's matinees, comic medals and badges are often made. To create them you need cardboard, pins and imagination.
Wedding decorations for witnesses
Often, when preparing a wedding, newlyweds want it to be remembered for a long time not only by them, but also by the guests who came to share the joy. Original badges are prepared for witnesses. Now it has become fashionable to order them from handmade craftsmen. But knowing how to make badges for witnesses with your own hands, you can safely get down to business.
For work you will need the following materials: satin ribbons suitable colors, cardboard, scissors, needle, thread, glue (heat gun is better), pins.
Cut 2 circles of the required size from cardboard (diameter - 5-6 cm). Prepare inscriptions that you can make yourself or print on a printer found on the Internet. The inscription must correspond to the dimensions of the cardboard blank. Glue messages or pictures onto one of the cardboard circles.
The next stage is decoration. Here you can give room to your imagination. The badge can be decorated with satin ribbons, making petals out of them using the kanzashi technique. Or make a frame of lace, which will look no less beautiful, but is much easier to do.
Most often, badges are made for witnesses in the shape of a flower or medal. Decoration elements are attached to the second cardboard circle using glue. At the end, the middle is closed with a circle with an inscription. A pin is attached to the back side. And the witness badges are ready. You can decorate them with beads, sequins, and rhinestones.
Badges from blanks
You can find blanks for badges on sale in craft stores. With their help you can do the most various options. Some simply have an image glued onto them, while others require the use of a special press to create the finished product. When purchasing, you should check with the seller for all the details.
Having a simple blank, you can make a simple badge from cardboard or paper. Use the printer to print the image you like, corresponding to the dimensions of the workpiece. You can draw it yourself or take a picture you like from a magazine. There are plenty of options.

Glue the picture onto cardboard that matches the size of the icon. The surface of the metal workpiece should be lightly sanded for better adhesion and the image should be glued with superglue. All is ready. For reliability, the picture can be laminated or coated with clear varnish. Here's how to make your own badge out of cardboard.
You can do without preparations at all. Just stick the image you like onto a cardboard or plastic base and attach a pin to secure it.
Lots of options
Knowing how to make a badge with your own hands, you can safely take on the production of such souvenir products. After all, maybe these products will also become collectibles.
More complex options are wooden badges. In craft stores you can find special blanks that can serve as the basis for a future product. You can also independently saw a thin fragment from a plate 0.5-1 cm thick and sand it. A drawing is painted on them or an inscription is written. You can use a burner to apply an image. There are plenty of options.

Those who master the art of wood carving can saw and carve products that are stunning in shape and beauty. These can be symbols, logos, amulets, and runes. Made in the popular eco-style, these products will become exclusive and stylish decoration. Those who know how to make wooden badges with their own hands do not need to rack their brains over holiday gifts.
Aluminum and lead - the basis for work
IN Soviet time Metal badges were popular. Now you can make them yourself, but this will require some tools and skills to work with them. Aluminum plates 2 mm thick are suitable for production. An image is applied to them, and then the shape is cut out and turned. The finished badge is coated with paint. This is painstaking work.
But you can cast a lead badge even at home. Lead is a fusible metal. You need to put small pieces of metal into a special container; solder used for soldering radio components is also suitable. Melt the metal over a fire and pour it into the mold. It must be heat resistant. There are ready-made options for sale; they can be found in specialized stores. Simple shapes can be made in regular sand. Sift the sand, compact it well and make a depression of the desired size and shape. Molten lead should be poured into it. When the metal has cooled, you need to sand the product and attach a pin to it. Further decoration is at the taste and discretion of the master.

Decorating - a flight of fancy
There are many options for how to make a badge with your own hands - everyone can choose the most suitable one for themselves. This could be a simple badge made of paper. But if desired, embroidery, wool for felting, beads and rhinestones, and other most unusual materials that came to hand during work can be used to make an exclusive version.
Such handmade products will definitely not go unnoticed. It's simple and affordable way self-expression in creativity.
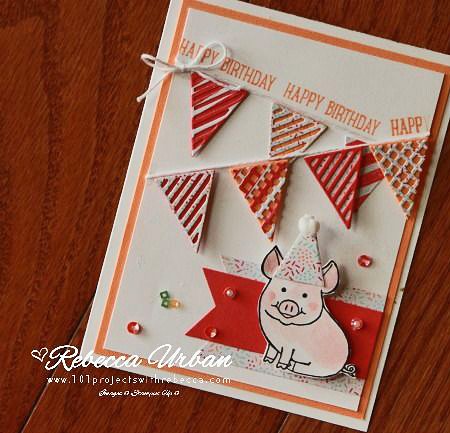
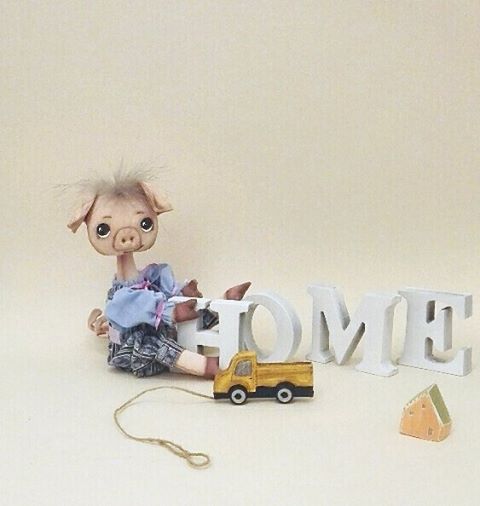
New Year 2019 is the Year of the Pig. If you suddenly thought that this animal couldn’t be beautiful or at least cute, then... it seemed to you! While this Krestik article was being prepared for publication, I personal experience I was convinced how charming a hand-made pig can be! Very soon, countless souvenirs will fill this world) So let the piglets, pigs and pigs be magnificent! A traditional exclusive for Krestik readers - a SUPER SELECTION of the most best ideas and master classes on creating the symbol of 2019 with your own hands!
DIY paper pigs
Applications in the form of piglets
The easiest way to create a craft with the symbol of 2019 is to glue an applique out of paper.
Cut out hearts from pink paper different sizes and glue the pig:

To glue the chamomile pig, print the template, cut out the parts from colored paper/cardboard desired shades and glue it to the base:

Pig is a quite popular character, take Peppa Pig for example :) If your child likes the characters of this cartoon, then let them make an applique out of paper!


The templates can be printed on a black and white printer, cut out all the details, and then put them on sheets of colored paper and trace them.
See how it's done:
The easiest way is to glue the finished applique onto a square or rectangular one:
which allows you to insert a banknote into a postcardThe same application can be used in different ways:
Decoration with a pig for a large paper clip
Even part of the face looks good on postcards:
Half of the face is made of paper and glued to the postcard
The outlines of the pig are completed with a black marker (author - SamfireGreetingCards)
By the way, about painted piglets! They are very suitable for postcards:
There are ready-made sets for sale, so-called stamps. They can be color or black and white:
With their help you can make many different New Year cards:
If you can’t find ready-made stamps, you can draw the pigs yourself.
Fancy smth in his video he shows how to make 5 simple cards, including one with a PIGGY (see video from 6:40)
Don't want to draw at all? Then print out these painted pigs, color and cut them out:
Children will definitely love them, especially fans of cult cartoons and video games!
Having made the base, decorate it with a pig's snout:
This is also possible!)
A primitive family of piglets is also very simple to make:
Photo from www.redtedart.com
And these 3D pigs are easy to make, watch the video from the channel ChucAnh's Hobbies:
Let’s complicate the task and make a more realistic pig with our own hands using the Origami technique:
Channel Child's world makes a similar pig:
Do you want to surprise someone for New Year? Make a piggy bank out of a banknote like this Julia Miers:
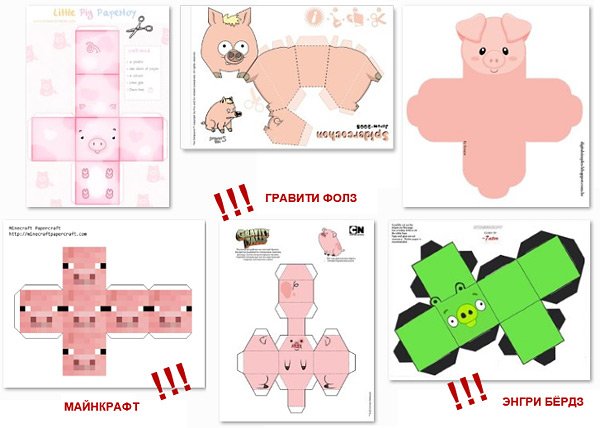
The most difficult thing to assemble is modular Origami. To assemble an Origami pig with your own hands, you will need 345 triangular blanks! If you are no longer new to this type of creativity, then you can probably handle it. To help - video from the channel papermagia.com.ua:
If we talk about pigs made of paper, then we must definitely mention the protruding pigs.
Openwork piglets cut out on paper will be very useful among lace trees, snowmen, bells and snowflakes.
You can cut out the silhouette of a pig on gift paper and wrap it as a New Year's present. You can cut it out of felt, make a backing underneath from contrasting fabric and sew a pillow.
Stitched pigs
A few illustrative examples of where to “place” a piglet made by yourself:
We complicate the level a little and sew a patchwork Piggy with our own hands using this master class.
You can sew clothes for Piggy, so it will be more interesting for girls to play with it)
No less adorable piglets are sewn on Territories of Creativity Elma-toys:
More complex toys are ideal as interior dolls:
Workshop ElizaKittenShop sews a tilde pig:
Fairy's Gift Workshop sells Tilda style Christmas pigs:
If you want to sew them yourself, then a master class from Valentina Svetlova:
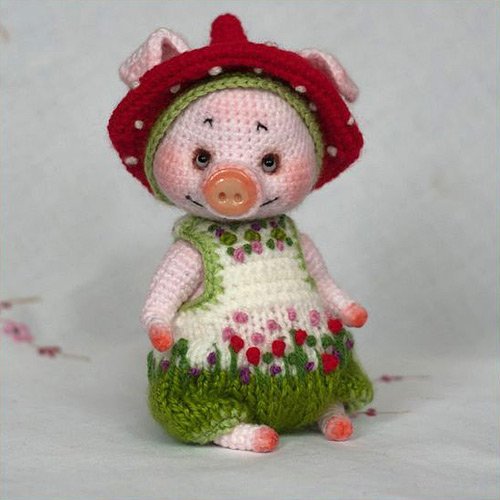
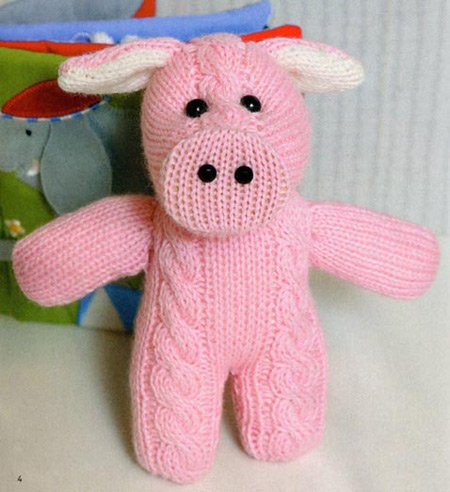
Every year there are more and more good master classes on knitting the symbol of the coming year, and the toys are more and more beautiful!
According to the master class "" this miracle fits in:
Zaikina Ksenia knitted this couple according to the above MK - take note of the clothing ideas!
Master Class)
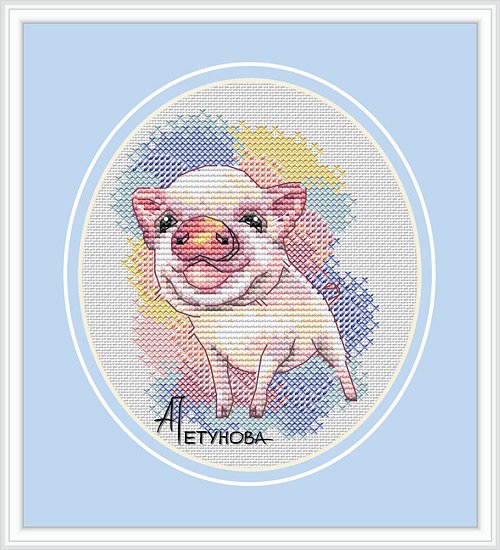
Cross stitched piglets
Traditionally, we don’t ignore embroidery fans! You can embroider a small pig and decorate it, an apron or.
Look for more than 76 different patterns for embroidering cartoon piglets, as well as quite realistic ones, in a special album our VK group :
Author's embroidery patterns for piglets are more interesting; they can be purchased from girl designers. For example, at Maria Nechaeva The “Embroiderer” pattern is ready:
Three schemes with wonderful New Year's piglets have been developed Antonina Tretyakova :
Anna Petunova :
Ekaterina Nemshilova :
Scheme of the ball "Pigs":
It was once created by Vera Kondratieva, and now it is ready to be born again for everyone)
Cool pigs on wheels and rocking chairs for decoupage and painting can be purchased at the store “Everything for creativity (dljatvorchestva)”
Pigs can be used as an accessory for dolls, Teddy bears and their friends
Look for decoupage napkins with images of pigs in handicraft stores in the city or in online stores. They are also available at the Masters Fair:
New Year's humor 2019
Let's end this article on a cheerful note and may the New Year 2019 be positive, joyful and inspiring!!!
And no one objects!
You won't get bored with these!
What a look!
We are all like that)
"Merry Christmas (Please Eat Chicken)"
The latest offer for New Year's Eve
A-ha-ha-ha-ha!!!


The approach of the New Year and Christmas is always a pleasant and bright event. In every home, on the streets, on store shelves, in courtyards, in school classrooms and kindergartens - everything breathes holiday. There is a special atmosphere in people's moods. And today we’ll talk about how to make New Year’s crafts depicting the symbol of 2019 with your own hands. I think many people know that the upcoming New Year, if you look at it through the “pages” of the eastern calendar - this is the year of the pig or boar, these 12 months simply have to be good - the pig is a homely, well-fed, fertile and generous animal. So let’s prepare something pleasant for the boar in the form of a simple New Year's decoration with his images and we will wait for a return gift.
I want to offer you very simple and at the same time bright and interesting ideas New Year's crafts that are suitable for assignments in kindergarten or school as a handmade gift from your kids, for relatives, close friends or guests.
Some of the projects from this collection are made of paper, others of felt, but we tried not to look for complex ones - this was one of the most important criteria, since we all remember the lack of free time, especially on the eve of the holidays.
A pig can be called a geometrically convenient animal, you will agree - two circles for the body and a heel, a couple of triangles for the ears, and four squares for the hooves... cut out, glued and that's it - the pig is ready. Well, let's look at the options for our crafts.
Craft symbol of the new year 2019
One of the most adorable craft ideas for the new year 2019 is a cute pink pig, thanks to the texture of the material, we will make it from cotton balls, slightly painted with light pink gouache. It looks like the craft is made from pink snowballs that the kids just made in the yard.

“Snowballs” are attached to a disposable paper plate or a circle cut out of any cardboard of the size you need. This project uses hot glue gun. We make the ears and snout from colored or pink-painted paper; by the way, you can also make a tail from it. We buy the eyes ready-made or draw them with a marker on a small piece of white cardboard and attach them to the craft. The finished pig can be sprinkled with glitter.
How to make a pumpkin pig craft
This year, handmade crowns are my favorite theme. Especially when it comes to all kinds of animals! Since the symbol eastern calendar, 2019 is the mumps, then let’s look at it. Well, first of all, this is a very harmonious combination: pumpkin and piglets)

For this option, we will need a pumpkin of any variety, but preferably a round, fairly even shape. The pumpkin can be painted any color - it's up to you. The ears are combined from two types of fabric - the basic one without ornament - both the snout and the mottled one for the inside of the ear are made from it. We make eyes and nostrils from black beads or buttons. The parts are attached using hot glue.
DIY Christmas tree toy
Great idea how to do it Christmas tree toy depicting the symbol of the New Year is to draw a piggy's face on a one-color pink ball. This holiday decor can be the start of your personal collection of your family's designer toys. There may be pigs different color and size, spots and expression of the eyes are also a personal matter, so just give free rein to your imagination.

On the surface of the selected Christmas ball It is better to paint with acrylic paints; first apply light colors to the ball, and apply black or dark elements last. On the back of the toy, draw a curled, cheerful tail of your charming pig, so she will be beautiful from all sides)
Craft piglets - symbol of 2019
For this charming couple of piglets, we will need two (if desired, more) empty eggs, so to speak, if you want to make animals of different sizes, then use a chicken and duck egg, or simply choose two different chicken eggs, making small ones on both “tops” holes using an awl or a thick needle and remove the liquid contents, rinse the shells and let them dry.

We make a puddle for our piglets from brown cardboard or paper, you can also use felt. For finished patches, glue buttons with two holes with hot glue so that they are positioned horizontally. We draw the eyes with a black felt-tip pen or a thin marker, and cut out the ears from pink paper. We construct hooves and tails from “fluffy” wire and place the piglets in a puddle - in in a good way this word.
New Year's toy - fleece pig
For those whose hands are truly golden, great idea for creating New Year's toys With your own hands, you can consider this charming “representative” of 2019 - a pig sewn from pink fleece fabric. Such a handmade item can not only be placed under the Christmas tree, but also given as a New Year’s gift to a loved one.

As a filler for such soft toy You can use synthetic padding polystyrene and small polystyrene foam balls, which can often be “found” inside anti-stress toys and in pillows for pregnant women - they are not only very pleasant to the touch, but also safe and environmentally friendly. The size of such a pig depends on your idea.
Paper pig craft
For the youngest artists and creative individuals, there is also a great project, the simplest of our entire list today, but at the same time very cute and pretty. For a paper pig we need a paper disposable plate, a black felt-tip pen or marker, a little office glue, pink gouache paint and paper for the snout, eyes and ears.

We paint the plate with gouache and set it aside to dry, in the meantime we cut out the snout and ears - we have them the same color, draw eyes on white paper and cut them out, when the plate is completely dry, glue the rest of the parts to it with office glue and finish drawing the nose and smile - the craft is ready. Simple and cute!
DIY pigs for the new year 2019
You can even turn small flower pots into adorable little hogs, you just need to give free rein to your inner artist, find a couple of plastic buttons and a fairly hard material for the ears. Paint the pots pink and attach the ears and heels using hot glue or super glue for plastic and ceramics.

When the craft is dry, draw eyes on the pigs - even nail polish or a stroke will be suitable for this purpose. For more charm, you can draw eyelashes or smiles on these cute faces with a black marker or felt-tip pen, but this is not strict - do it as you and your child like.
How to make a New Year's craft - a pig's face
Another simple and wonderful craft for the 2019 New Year - adorable faces of felt pigs. For such a miracle, patterns are not particularly needed - we just select a basic piece of pink material, draw the silhouette of a muzzle on it, and make the inner parts of the ears from felt of a different shade and a slightly smaller size. The patch can be made round or oval - this is not strict. If desired, by the way, this craft can be made double-sided by simply sewing two ready-made faces together.

We embroider the eyebrows and smiles of our cute pigs with brown or black threads. For the eyes, shiny black rather large beads or beads are suitable, see what you have at hand. Sew loops of a suitable length to the crafts, and now we have a DIY Christmas tree decoration in front of us.
Piglets for the New Year - crafts
This New Year's craft more difficult, but if your hands grow from the right places, then you can do this. This pair of charming pink beauties is not just a symbol of the coming New Year, but a full-fledged gift! Agree, such handmade things, created with love and soul, simply cannot but please.

The soft felt texture and these adorable knitted scarves They go perfectly with each other and with the festive winter atmosphere. It is believed that such material symbols will bring good luck to their owner all year, in which “pissiness” is the best omen, even if the amulets are so cool.
Felt pincushion in the shape of a pig
Here's an idea for a cute and very practical gift - a felt pincushion in the shape of a pig. Such a craft will surely please your mother, your beloved grandmother, your older sister, and any needlewoman. The first plus of this project is the ease of execution and the second is the minimum necessary materials And, by the way, you don’t need any special sewing skills either.

We will need 6 squares of felt (of sufficient density) pink, small piece lighter material - for the snout and ears, thread, needle, a little filler - padding polyester is perfect - and two small beads for the eyes. We will sew the craft with a regular seam - over the edge, you can choose the color of the threads to suit your taste, and you can also embroider a snowflake or initials on one of the sides of the pig to the person you decide to give it to.
In general, New Year's crafts, be it a card or a card, that we make ourselves, are an excellent reason to spend time with our children, to stay longer in our own winter's tale and create your own New Year’s Eve, even if it’s simple and small, but still a work of art. If you figure it out, you can mold, cut, glue or sew something interesting from what you have at hand, the main thing in this matter is the mood. I think that you have already chosen an outfit and decided what to give to whom, chose and made a list, signed Christmas cards and got ready for the long weekend) All we have to do is wish you Happy holidays and may the Pig bring us good luck, health and good mood for your entire, so to speak, year of service!